So you want to be a leather worker?
Buckle up, I might get a little long winded.
April of 2017 I decided I was going to become a leatherworker. It was really a decision that came at the end of a quest to find a way to create. I was hungry to build with my hands, something, anything. So for months I scoured YouTube hoping to find my thing. I thought about woodworking, but I had close friends that were already doing that. I spent three weeks watching videos on how to forge. I convinced myself I was destined to be blacksmith. I mean that is a pretty masculine thing to do right? Then it dawned on me that living in Texas and standing over a scorching hot forge in the dead of summer in a shack would be less than enjoyable.
"When I look at leather things I can see a raw level of awesomeness in it"
So, alas… I ended up deciding that leather would be my thing. I mean I love leather. My beautiful bride had bought me a Saddleback Classic Briefcase a few years back, which I love. When I look at leather things I can see a raw level of awesomeness in it, so why not. Just like my hobby ideas that had proceeded this one I spent a good bit of time researching the trade online. I want to take a moment to point something out. We live in a pretty amazing time, if you want to be a baker, woodworker, blacksmith, homebuilder, lion tamer or ninja you can find some pretty comprehensive videos that can get you up to speed on the how-to’s fairly quickly. All you need is the drive or hunger to do it. If you combine that hunger with the hustle… you may just find yourself quite successful at whatever adventure you set off for.
I have a fitbit I wore for two weeks. Still got it. Don’t wear it.
As I searched video after video I found myself coming back to what I determined would be step one in getting this thing rolling… buying tools. Now this was a hang up for me with previous trades, forges aren’t cheap and I must admit I have this tendency to dream a bit which, at times, results in me spending large sums of money on things that for a season are pretty awesome only to look back a decade later at a dust covered “whatever” remembering that time I “almost”.
What I needed was the ability to launch with minimal amount of capital up front. I say capital to give myself a little bit of business credibility. I say “capital” and a little voice inside you says “oh wow, this guy is a regular Rockefeller. He must know Richard Branson." What I really mean by capital is, how can I get this thing going without my beautiful wife questioning my fiscally irresponsible decision.
I turn to Google. Search. Must have tools to do leatherwork? In Google’s infinite wisdom she points me back… YouTube. Where I proceed to spend hours upon hours of my life watching self categorized pro’s break down the must have 10-12 tools to work with leather. After spending hours and hours of watching video after video I formulate a collection of tools mentioned most commonly amongst them all, I scribble it down on a notepad in my best psychopathic handwriting, hop in my car and set off for Tandy. Head up, chest out, I strolled in that place like a boss. Threw down my list of tools and $200 later sauntered out ready to become a master leather worker.
The next 5 days consisted of me using every tool. Not to make anything, just to learn how they worked. I grabbed the edge beveler, and beveled edges. I took the stitch groover, and grooved stitches. After those 5 days I grabbed my chunk of cow flesh and begin to make a card pouch. It wasn’t a wallet, and in the end didn’t really look like a pouch. It was really just two pieces of leather sewn together. I used every tool I had bought. The only problem was… I didn’t need to.
See, after honing my craft (it is still a far far WAY from honed but it getting there) I learned that you really only need a couple of inexpensive tools to get going and they will actually take you a long way. Confession time… I no longer use that edge beveler… or stitch groover. That V-Gouge I thought I needed, collecting dust. Might I use them at some point, might you need them? Maybe, but not to get started. Find out who you are as a leather worker and buy the tools you need as you need them. So! Before you jump in like I did, I wanted to impart a little bit of short learned wisdom. My hope is, it gives you the courage to give this leather thing a try. Maybe the lower “capital” expense will push you into making the leap into a really fun trade.
If you want to see any of my work you can go check me out on Instagram, Facebook, YouTube, and whatever new platform that hasn’t come out yet. (@unionleather) I focus a lot on wallets, occasionally will knock out a tool roll or belt. For all of the things I make, these few items are what I use consistantly. Now I want to clarify, by the time you read this I may of added tools or bought better versions of what I started with. But that does not take away from what you really need to launch. Story time is over…let’s get in to it.
Leather
That’s right. In order to work with leather one must possess…leather. Now Leather choices will be a post for another day…because that is a rabbit hole you can fall down for days. I made a mistake, which I hope you learn from. I walked in, bought the biggest piece of the cheapest stuff. It was a 5mm thick piece of low grade veg tan leather. Perfect for tooling or a knife sheath or tooling a knife sheath. But I wanted to make wallets, key chains, things I could carry everyday. My lesson to you isn’t to buy or not buy the thick veg tan. The lesson is know what you want to make before you buy the leather. Look at stuff already made that you are wanting to also craft. If it is made from thick leather then get the thick leather. Nothing stunted my growth more than not being able to make what I wanted because I got the wrong piece of hide.
Box Blade
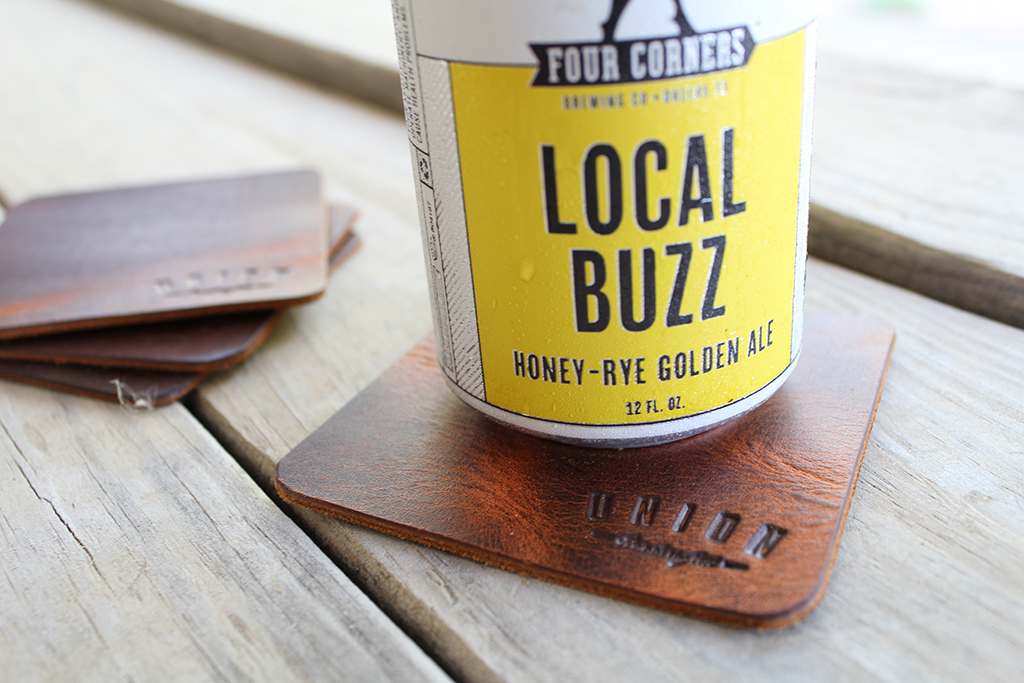
Should you stick with this whole leather thing you will end up buying some crazy expensive cutting tool, round blade…pattern knife. Day 1 - Day 365 a box blade will do just fine. Blades are cheap for it and a sharp blade is important. Abraham Lincoln may or may not of said “If I had 6 hours to chop down a tree I would spend 4 of them sharpening my axe” Now I don’t know if he actually said that. But it is sound advice none the less. The better shape the tool the easier it is to use it and having a sharp knife makes all the difference. Project number 1, make a coaster. Use the leather *see step 1* and cut a piece of it into a square. If you want to get fancy, round the corners. Presto Bango, you are now a leather worker.
Mallet
It can be wood, poly, rubber. Just make sure it isn’t metal. You won’t be hammering any nails with it. You may already have one, Tandy sells a few different types. You can even grab one at Home Depot. You do not NEED the Thor looking $100 two pound Poly Maul. Someday maybe, not today. The cheap one will do, and it will probably last much longer than you will need it.
Punch
If you are going to do any stitching do yourself a favor and by yourself a 4 hole punch. I bought a 2 hole, and 1 hole diamond punch right out of the gate. Today I use a 4 hole exclusively. “But what about going around corners?” you may ask… I don’t do a lot of curved projects, mine all have angles. If you are wanting to do a knife sheath for a big rounded blade than look at a 2 hole and 4 hole punch. That 4 punch will save you a lot of time and people will be in awe of how straight your stitch lines are.
Thread (and needles)
This sort of falls in the “you need leather to make things out of leather” category. You need thread to stitch the leather together. Important to recognize that a majority of what you will be making will be stitched together. You can buy a lot of different types of thread, I have used hemp, cotton, and poly both waxed and unwaxed. There may be something better out there but for what I do, I have found Waxed Poly to be the best. The wax protects the thread, water proofs it and ensures tensile strength. The Poly melts. Now this can be a bad thing if you are a fire fighter running into a burning building. But for the average person it will never be put in a scenario where that will be an issue. The reason it is a good thing is because you do not tie off a saddle stitch. Once you get to the end of the stitch line you back stitch, cut, and melt the thread. By melting the tip of the poly in the last stich hole it widens and hardens creating a rivet that should, if done properly, lock into place. I feel I must point out that in order to use the thread you will need needles. Make sure you get blunt needles for leather working, you aren’t punching holes with it and you want the needle to glide through the hole you punch, not make its own.
Now, I am going to follow this up with a “take it to the next level” post, but the above 5 items will allow for you to cut out a leather pattern for a wallet or sheath and will allow you to punch the holes and stitch those piece of leather together to make something that will last you a life time. Are there tools you can use to make the process easier, sure there are. Can you invest in things to make the end product look even better when you get done with it. Sure you can. My hope is that you read this post and think, "well dad'gum...I have most of that stuff already...I might just give this leather thing a whirl." Go for it, go cut out a 3.5” square of leather, throw it on a table, set a cold one on it, and sit back and bask in your leather working awesomeness.
Ryan
Proprietor / Union
The views and opinions in the above post reflect my own personal thoughts. there very well may be better ways or processes. learn them, teach them, and we all get better together.
We would love to hear about your leather journey. Send us an email ryan@unionleather.co or a DM and let us know how things are going, ask us questions, or rant about how wrong we are. We love the dialogue.